Votre nouvelle machine CNC est arrivée. Mais avant de pouvoir commencer à usiner des pièces, une question est plus importante que toute autre : est-elle correctement installée ?
Une installation incorrecte peut entraîner des vibrations, un usinage imprécis, des arrêts imprévus et des reprises coûteuses, même avec une machine CNC de haute qualité. Heureusement, la plupart de ces problèmes peuvent être évités en suivant la procédure d'installation adéquate dès le départ.
Ce guide vous présente 9 étapes essentielles pour une installation réussie de votre machine CNC. De la préparation du site à la mise à niveau de la machine, en passant par les essais de coupe finaux, chaque étape est conçue pour vous aider à accélérer la mise en production de votre machine tout en garantissant précision, fiabilité et performance à long terme.
L'installation réussie d'une machine CNC commence bien avant son arrivée dans votre usine. Prendre le temps de préparer le site, les réseaux et le matériel de levage peut vous éviter des heures, voire des jours, de retard lors de l'installation.
Avant de décharger votre machine, assurez-vous que tout est prêt. Cela accélère non seulement l'installation, mais protège également la machine contre les dommages et permet une mise en service sans interruption.
La zone d'installation doit offrir un espace suffisant pour le fonctionnement, la maintenance et les interventions ultérieures de la machine. Le sol doit être suffisamment solide et plan pour supporter le poids de la machine sans vibrations excessives ni tassement. Il est également important de tenir la machine éloignée des sources de chaleur, de la poussière en excès, de l'humidité et de tout autre facteur environnemental susceptible d'affecter la précision d'usinage.
Avant l'installation, assurez-vous que tous les utilitaires nécessaires sont disponibles. Cela inclut généralement une alimentation électrique stable, de l'air comprimé, du liquide de refroidissement, de la lubrification et une connexion réseau si votre système CNC requiert une surveillance à distance ou un transfert de données. Vérifier ces connexions au préalable permet d'éviter les interruptions de service inutiles lors de la mise en service.
Grandes machines CNC Un équipement de levage adapté est indispensable pour un déchargement et une mise en place en toute sécurité. Préparez la grue ou le chariot élévateur nécessaire, les outils de levage, les instruments de niveau de précision et les accessoires d'installation de base avant l'arrivée de la machine. Disposer du matériel adéquat permettra à l'équipe d'installation de réaliser l'opération de manière sûre et efficace.
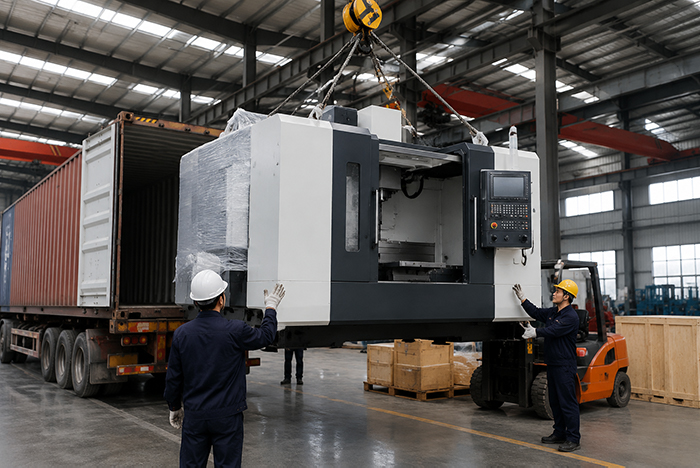
Avant de commencer l'installation, assurez-vous que la machine CNC est déchargée en toute sécurité à l'aide d'un équipement de levage approprié, tel qu'une grue ou un chariot élévateur. Suivez toujours les instructions de levage du fabricant afin d'éviter d'endommager la machine ou ses composants de précision lors de la manutention.
Une fois la machine au sol, inspectez-la soigneusement afin de déceler tout signe de dommage lié au transport. Vérifiez le châssis, l'armoire électrique, la zone de la broche et les composants apparents, puis comparez tous les accessoires et documents avec le bon de livraison pour vous assurer qu'il ne manque rien. Si vous constatez des dommages ou des pièces manquantes, contactez le fournisseur avant de procéder à l'installation.
Liste de contrôle:
Une fois la machine CNC déchargée et inspectée, déplacez-la vers son emplacement définitif. Un positionnement adéquat est plus important que de simplement trouver suffisamment d'espace au sol : il influe directement sur la maintenance future, la manutention des matériaux et l'efficacité globale de la production.
Installez la machine sur une base stable, en laissant suffisamment d'espace pour permettre aux opérateurs de charger les pièces, de changer les outils et d'effectuer la maintenance courante. Évitez d'installer la machine à proximité de sources de chaleur excessive, d'humidité, de fortes vibrations ou d'équipements à fort impact, car ces facteurs environnementaux peuvent réduire la précision d'usinage et la fiabilité à long terme.
Liste de contrôle:
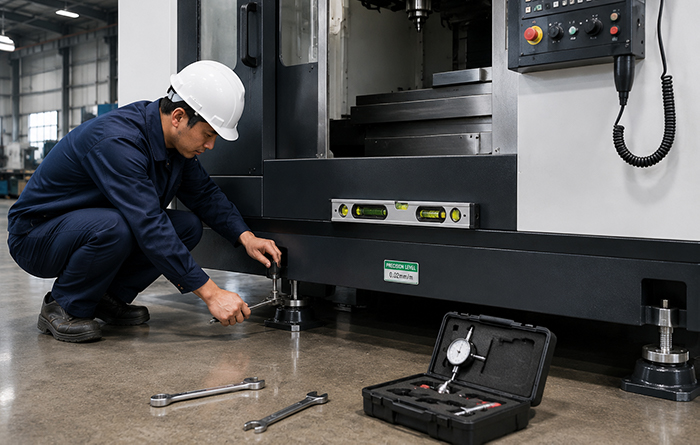
Le nivellement de la machine est une étape cruciale de l'installation. Même une machine CNC de haute précision ne peut garantir une précision d'usinage constante si elle n'est pas correctement nivelée. Un mauvais nivellement peut entraîner une perte de précision, une usure irrégulière et des performances de coupe instables.
Utilisez un niveau de précision pour ajuster les boulons de nivellement jusqu'à ce que la machine soit conforme aux spécifications du fabricant. Après le nivellement, vérifiez la stabilité de la machine et effectuez les derniers réglages nécessaires avant de procéder à sa mise en service.
Liste de contrôle:
Une fois la machine mise à niveau, raccordez tous les utilitaires nécessaires avant de la mettre en marche. Une alimentation électrique stable, de l'air comprimé propre et un système de refroidissement en bon état de fonctionnement sont essentiels au bon fonctionnement et à la longévité de la machine. Avant tout raccordement, vérifiez que les spécifications des utilitaires correspondent aux exigences de la machine.
Une fois tous les systèmes connectés, inspectez soigneusement chaque connexion afin de détecter toute fuite, tout câble desserré ou tout câblage incorrect. Ces vérifications effectuées dès maintenant permettent d'éviter les alarmes inattendues ou les interruptions lors du démarrage et de la mise en service.
Liste de contrôle:
Une fois la machine principale connectée et prête, l'étape suivante consiste à installer les accessoires standard ou optionnels. Selon la configuration de la machine, il peut s'agir d'un convoyeur à copeaux, d'un réservoir de liquide de refroidissement, d'un magasin d'outils, d'une table rotative, d'un palpeur ou d'autres équipements auxiliaires. Assurez-vous que chaque accessoire est correctement installé et connecté conformément aux instructions du fabricant.
Après l'installation, vérifiez que chaque accessoire fonctionne correctement et communique bien avec le système CNC. Identifier et résoudre tout problème à ce stade contribuera à garantir un démarrage sans encombre et une production fiable.
Liste de contrôle:
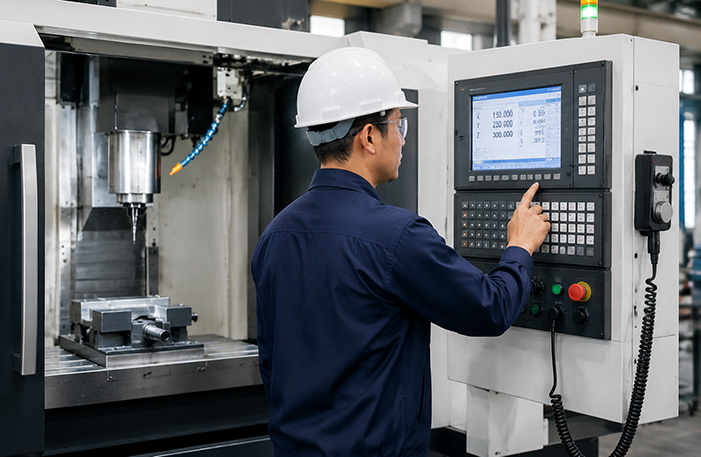
Une fois l'installation terminée, il convient de mettre en marche la machine CNC et d'effectuer un contrôle fonctionnel de base. Cette étape permet de confirmer le bon fonctionnement de tous les systèmes principaux avant de procéder à l'étalonnage et aux essais d'usinage.
Mettez la machine en marche conformément à la procédure de démarrage du fabricant, puis vérifiez la commande numérique, les mouvements des axes, la rotation de la broche, l'arrêt d'urgence et les autres fonctions de sécurité. En cas d'alarme ou d'anomalie, résolvez le problème avant de passer à l'étape suivante.
Liste de contrôle:
Avant la mise en production de la machine, effectuez l'étalonnage nécessaire afin de garantir la précision d'usinage requise. Un étalonnage correct permet de vérifier le bon fonctionnement de la machine et de réduire les risques d'erreurs dimensionnelles en production.
Vérifiez la précision de positionnement de la machine, le dimensionnement de l'outil et la précision géométrique générale conformément aux recommandations du fabricant. Si nécessaire, effectuez des réglages fins jusqu'à ce que la machine soit prête pour un essai de coupe.
Liste de contrôle:
Avant de lancer la production en série, effectuez un essai de coupe afin de vérifier le bon fonctionnement de la machine en conditions réelles d'usinage. Cette étape permet de contrôler non seulement la précision de la machine, mais aussi les performances de l'outillage, du bridage et du programme d'usinage.
Usiner une pièce d'essai et contrôler ses dimensions, son état de surface et sa qualité générale. Si les résultats ne sont pas conformes aux spécifications requises, procéder aux ajustements nécessaires avant de lancer la production en série.
Liste de contrôle:
Une installation réussie ne se limite pas à un essai de coupe concluant. Avant de passer à la production en série, assurez-vous que les opérateurs maîtrisent les commandes de la machine, les procédures de démarrage quotidiennes et les consignes de maintenance de base. Des opérateurs bien formés permettent de réduire les erreurs de manipulation, d'améliorer l'efficacité et de prolonger la durée de vie de la machine.
Une fois la machine en bon état de fonctionnement et tous les contrôles effectués, vous pouvez démarrer en toute confiance la production régulière tout en respectant les programmes d'inspection et de maintenance de routine.
Liste de contrôle:
Même une machine CNC de haute qualité peut présenter des problèmes de performance si elle n'est pas installée correctement. Évitez ces erreurs courantes pour garantir une installation réussie et des performances d'usinage fiables.
Préparation du site non effectuée
L'installation d'une machine sur un sol inadapté ou dans un espace de travail mal conçu peut entraîner des vibrations, un accès limité pour la maintenance et des retards d'installation inutiles.
Nivellement incorrect de la machine
Un nivellement incorrect est l'une des causes les plus fréquentes d'une faible précision d'usinage et d'une usure irrégulière de la machine. Il est impératif de toujours vérifier le nivellement correct de la machine avant sa mise en service.
Raccordements incorrects aux services publics
L'utilisation d'une alimentation électrique inadaptée, une pression d'air instable ou un système de refroidissement mal raccordé peuvent déclencher des alarmes machine ou perturber le fonctionnement normal.
Ignorer l'étalonnage
Passer directement à la production sans vérifier la précision des machines peut entraîner des erreurs dimensionnelles et une qualité d'usinage irrégulière.
Ignorer les résultats des essais de coupe
Un démarrage réussi ne garantit pas que la machine soit prête pour la production. Il est impératif d'inspecter la première pièce d'essai et d'effectuer les réglages nécessaires avant de lancer la production à grande échelle.
1. Combien de temps prend généralement l'installation d'une machine CNC ?
Le temps d'installation dépend de la taille de la machine, de sa configuration et des conditions du site. Un centre d'usinage vertical standard peut généralement être installé et mis en service en un à trois jours, tandis que les grandes machines à portique, les aléseuses horizontales ou les lignes de production avec de nombreux accessoires peuvent nécessiter plusieurs jours, voire plus.
2. Quel degré de précision est requis pour le nivellement des machines CNC ?
Le nivellement des machines influe directement sur la précision d'usinage, les performances des broches et l'usure des composants. La tolérance de nivellement requise varie selon le type de machine et le fabricant ; il est donc essentiel d'utiliser un niveau de précision et de respecter les spécifications d'installation recommandées plutôt que de se fier à un contrôle visuel.
3. Que faut-il vérifier avant le premier essai d'usinage ?
Avant d'usiner la première pièce, vérifiez que la machine est correctement mise à niveau, que tous les raccordements sont corrects, que les systèmes de lubrification et d'arrosage fonctionnent normalement et que la commande numérique, la broche et les axes fonctionnent sans alarme. Une inspection complète garantit la réussite de l'essai de coupe.
4. Quelles sont les erreurs d'installation les plus courantes sur les machines CNC ?
Les erreurs les plus fréquentes sont une mauvaise préparation du site, un nivellement incorrect de la machine, des branchements électriques ou pneumatiques inadéquats, l'absence d'étalonnage de la machine et le démarrage de la production sans essai de coupe. Éviter ces problèmes permet de réduire les temps d'arrêt et garantit le bon fonctionnement de la machine.
5. À quelle fréquence une machine CNC doit-elle être rénivelée ?
En conditions normales d'utilisation, une machine CNC ne nécessite pas de réalignement fréquent. Toutefois, il convient de la vérifier après un déplacement, un tassement des fondations, un choc important ou dès que la précision d'usinage commence à diminuer. Un contrôle périodique contribue également à préserver les performances de la machine sur le long terme.
Une installation correcte de votre machine CNC est la première étape pour garantir des performances stables, une précision constante et une production fiable. En suivant ces neuf étapes d'installation, vous éviterez les erreurs courantes, réduirez le temps de mise en service et optimiserez le potentiel de votre machine CNC.
Si vous prévoyez l'installation d'une nouvelle machine CNC, collaborer avec un fabricant expérimenté peut contribuer à garantir une installation plus fluide et un succès d'usinage à long terme.